Discover all about closed loop feedback and how you can set it up.
Let's take a step back first, what exactly is closed feedback?
With closed loop feedback (CLF) you can 'trigger' an action to certain answers in the survey or based on the total score of metadata. In most cases this is an email, but also creating actions in Salesforce or Hubspot can be triggered with CLF. You can easily set up the email trigger yourself. If you want to create an action in CRM, it is helpful to ask help from an IT professional. Contact your Customer Success Manager for this.
Field example:
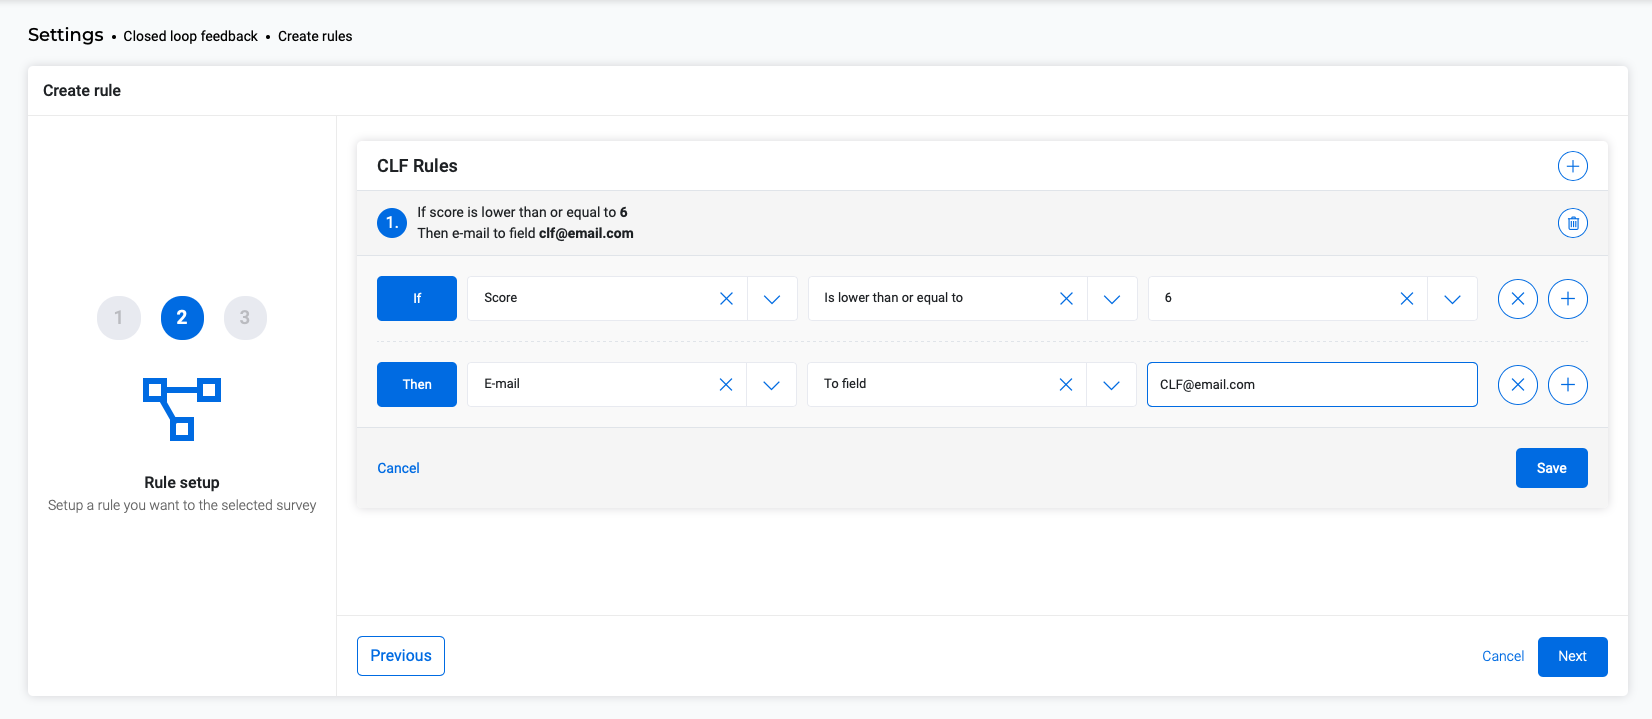
In a survey you ask "What grade would you give us?". You have internally determined that everything under a 7 is not a good sign. Action!
You set this up as follows:
- Go to 'Settings' in the menu to the left.
- Choose 'Closed Loop Feedback'.
- Choose create rule (blue button)
- Choose the survey for which you want to make a closed loop feedback rule and click next.
- The first rule is already there, choose the blue arrow. If it is your second rule, choose plus.
- At Entity you can choose from:
- Score: Choose this if you want to act based on the total survey score.
- Question: Choose this if you want to act based on the answer to a question.
- Metadata: Choose this if you want to act based on certain Metadata.
- Based on your choice, the option to choose on which question you want to act will appear. In the field example mentioned earlier, the question "what grade would you give us?" has been chosen.
- Choose when you want to execute a CLF action. In this action 'is equal to' is chosen. Then choose a value, for example 6 (this is lower than 7).
- The action bar will open automatically. In the example, 'email' is chosen.
- In this action bar you can choose email or metadata field. When you choose email, you can fill in an email address to which you want to receive action. If you choose metadata, you can choose your own metadata, like 'accountmanager'. In this case you can send the email directly to the chosen accountmanager. Your Customer Success Manager can tell you all about this.
- In order to set up your final CLF, choose 'Save'.
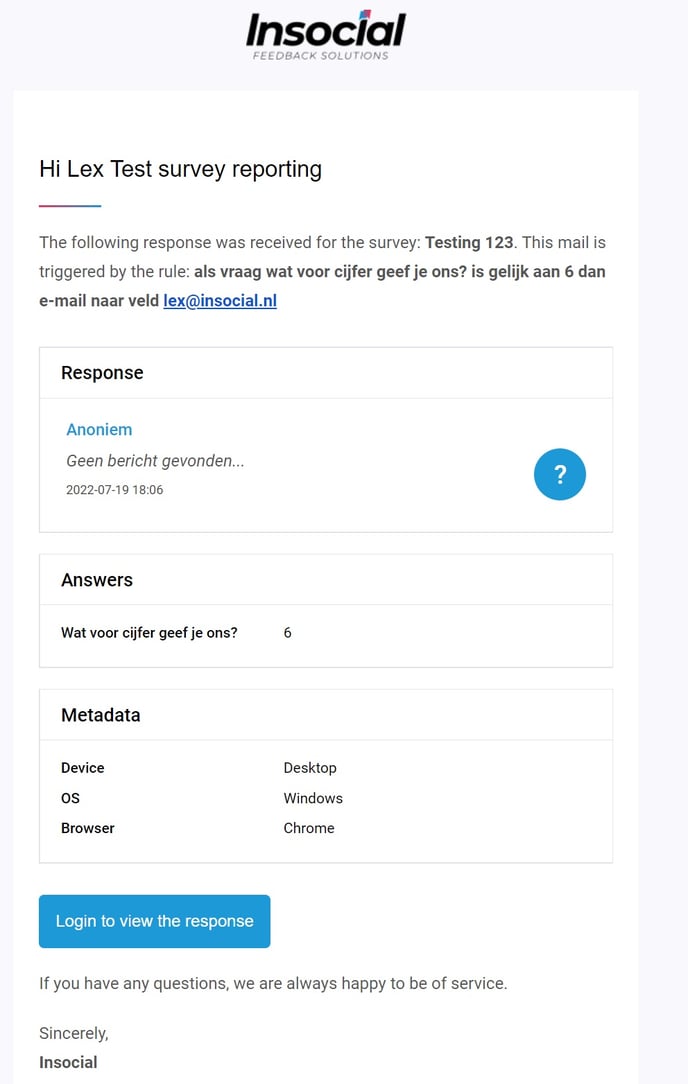
- In the screenshots below you can find examples of the screens mentioned above and the output. Are you facing problems? Don't worry! Feel free to contact your Customer Success Manager.